Emergency Water Storage and Filtration
Safe water can become unavailable when disasters damage pipes, interrupt treatment systems, reduce pressure, or contaminate local supplies. Households need water for drinking, food preparation, hygiene, sanitation, and some medical needs.
Quick answer
Store at least one gallon of water per person, per day for a minimum of three days. If you have space, build toward 7 to 10 days. Keep some water ready to drink, know how to treat questionable water, and identify backup sources before you need them.
On this page
Why water matters
Water is one of the first resources that becomes stressful when normal services are interrupted. You may need it for drinking, cooking, cleaning, basic hygiene, pets, medical needs, and sanitation.
- Drinking: Water keeps everyone hydrated and helps prevent heat illness, headaches, dizziness, and dehydration.
- Sanitation: Water supports handwashing, basic cleaning, toilet flushing where systems still work, and hygiene.
- Food preparation: Many shelf-stable foods still require water for cooking, mixing, or cleanup.
- Medical needs: Water may be needed for wound care, medications, mobility aids, hygiene routines, or other household health needs.
A practical planning baseline is one gallon per person, per day. That is a minimum. Plan extra for hot weather, pregnancy, nursing, illness, pets, medical needs, or anyone who needs more water than average.
Water storage
Store water in more than one place and in more than one type of container when you can. A mix of ready-to-drink containers, larger jugs, and emergency-fill options gives you more flexibility.
Plastic bottles
- Plastic bottles are easy to buy, carry, and rotate through normal household use.
- They work well for small spaces, car kits, bedrooms, offices, and evacuation bags.
- Keep a backup supply that is not used for everyday drinking unless you are intentionally rotating it.
- Store bottles in a cool, dark place away from fuel, chemicals, heat, and direct sunlight.
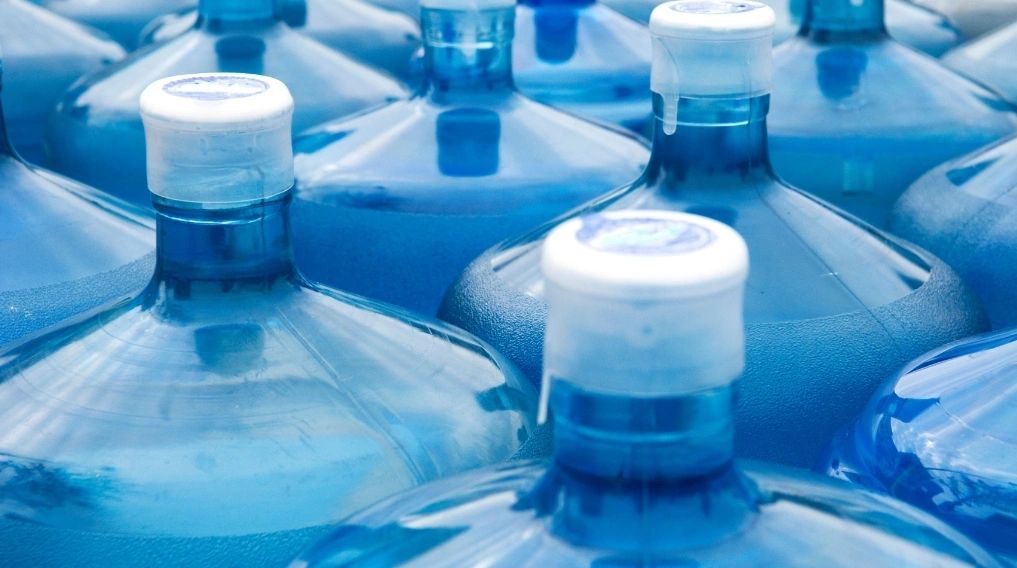
Plastic or glass gallons
- Gallon containers make it easier to count how many days of water you have stored.
- They are useful for families because one container roughly equals one person’s minimum daily amount.
- Rotate store-bought gallons according to the printed date or sooner if the container is damaged.
- Glass can last longer but is heavier, breakable, and less practical for evacuation.
Five-gallon jugs
- Five-gallon containers can store more water in less floor space, but they are heavy when full.
- Use food-grade containers that are designed for potable water.
- Store them where they do not need to be lifted often, and make sure you can dispense the water safely.
- Label the fill date and rotate or treat stored water according to the container guidance.
Clean food-grade containers
- Some clean, food-grade containers can be reused for emergency water if they previously held food or drink.
- Avoid containers that held milk, juice, chemicals, cleaners, fuel, or anything hard to fully sanitize.
- Wash, sanitize, rinse, and dry containers before filling them with drinking water.
- Use tight-fitting lids and label the containers clearly.
Collapsible storage bags and bathtub bladders
- Collapsible containers save space when empty and can be filled before a storm, outage, or planned water shutoff.
- Bathtub bladders can hold a large amount of water for washing, flushing, and sometimes drinking if the product is rated for potable water.
- They are only useful if you have enough warning to fill them before water service is interrupted.
- Keep them clean, dry, and stored with their instructions.
Built-in or inline water tanks
- Larger tanks can support longer disruptions, especially for rural homes, off-grid systems, or households with more space.
- Use potable-water-rated tanks, fittings, and hoses.
- Protect tanks from freezing, heat, contamination, and pests.
- Plan how you will access, filter, treat, and move water from the tank during an outage.
Water treatment
Stored drinking water is best, but you should also know how to treat questionable water. Treatment depends on what may be in the water. Cloudy, contaminated, chemically affected, or flood-exposed water may require different steps.
Boiling
- Boiling is one of the most reliable ways to kill many disease-causing organisms.
- If water is cloudy, let it settle and filter it through a clean cloth or coffee filter before boiling.
- Bring water to a rolling boil for at least one minute. At elevations above 6,500 feet, boil for three minutes.
- Let water cool in a clean, covered container before drinking.
Chlorinating
- Unscented household bleach can disinfect some water when used correctly.
- Use only plain, unscented bleach without added cleaners, fragrances, splashless formulas, or color-safe additives.
- Follow current public-health guidance for the correct amount, mix well, and let it stand before drinking.
- Do not use bleach for water that may be contaminated by fuel, chemicals, sewage, or floodwater unless local officials say it is safe and provide instructions.
Filtering
- Water filters can remove sediment and, depending on the filter, some bacteria, protozoa, chemicals, or metals.
- Choose filters based on what they are certified to reduce, not just the brand or style.
- Some filters improve taste but do not make unsafe water safe to drink.
- Keep replacement cartridges, clean containers, and instructions with the filter.
Purification tablets
- Purification tablets are compact and useful for evacuation bags, camping gear, and emergency kits.
- They usually require a waiting period before the water is safe to drink.
- Cold or cloudy water may require longer contact time or pre-filtering.
- Check expiration dates and follow the package directions exactly.
Solar distillation
- Solar distillation can separate water from some contaminants, but it is slow and depends on sun, setup, and conditions.
- It is better as a backup skill than a primary household water plan.
- Practice before you need it if you plan to rely on this method.
Water acquisition
Backup sources are helpful, but they should not replace stored drinking water. Treat unknown water before drinking unless trusted officials say it is safe.
Water within your home
- Check stored containers first.
- If safe and accessible, water heaters may hold usable water, but you need to know how to shut off power or gas and drain them safely.
- Ice cubes, melted freezer ice, and water in plumbing lines may help in short disruptions.
- Do not drink water from toilet tanks, radiators, waterbeds, swimming pools, or chemically treated sources.
Rain collection
- Rainwater can be useful for washing, flushing, gardening, and, with proper treatment, some emergency uses.
- Roof runoff may contain dirt, animal waste, roofing materials, chemicals, or debris.
- Use clean collection containers and treat rainwater before drinking.
- Check local rules if you plan to install a permanent collection system.
Natural water sources
- Streams, lakes, ponds, and springs may look clean but can contain bacteria, parasites, chemicals, or runoff.
- Collect from the clearest available source and avoid water near roads, farms, factories, flood areas, or visible contamination.
- Filter sediment first, then disinfect using an appropriate method.
- Do not use natural sources that officials warn are unsafe.
Dew and graywater
- Dew harvesting produces very small amounts and should be considered a last-resort skill, not a main supply plan.
- Graywater from washing or rinsing may be useful for flushing or outdoor cleaning when safe, but it is not drinking water.
- Keep graywater separate from drinking water and use it quickly to reduce odor, pests, and contamination risk.
First steps
- Store at least one gallon of water per person, per day for three days.
- Add extra water for pets, hot weather, medical needs, or anyone who may need more.
- Keep water in more than one container type and in more than one location.
- Add one treatment method, such as a reliable filter, purification tablets, or plain unscented bleach with instructions.
- Label stored water with the date and set a reminder to rotate it.
- Identify one safe backup source in your home and one outside your home.
- Keep clean containers available for filling before storms, planned shutoffs, or outages.
Frequently Asked Questions
How much emergency water should I store?
Start with at least one gallon per person, per day for three days. If you have space, build toward 7 to 10 days and add extra for pets, medical needs, hot weather, pregnancy, nursing, or hygiene.
How long does stored water last?
Commercially bottled water should be rotated according to the printed date or sooner if the container is damaged. Water stored in clean containers should be labeled, kept cool and dark, and rotated on a schedule that matches the container and treatment method.
Can I use water from my water heater?
In some situations, yes, if it is safe and accessible. Know how to shut off electricity or gas, let the water cool, and drain it safely. Do not use it if the system may be contaminated or damaged.
Is boiling enough to make water safe?
Boiling can kill many germs, but it does not remove fuel, chemicals, heavy metals, salt, or some other contaminants. If water may be chemically contaminated or exposed to floodwater, follow local official guidance.
What is the best water filter for emergencies?
The best filter depends on the risk. Look for filters that clearly state what they are certified to reduce, keep replacement parts, and understand whether the filter removes sediment, bacteria, protozoa, chemicals, or metals.
Keep building